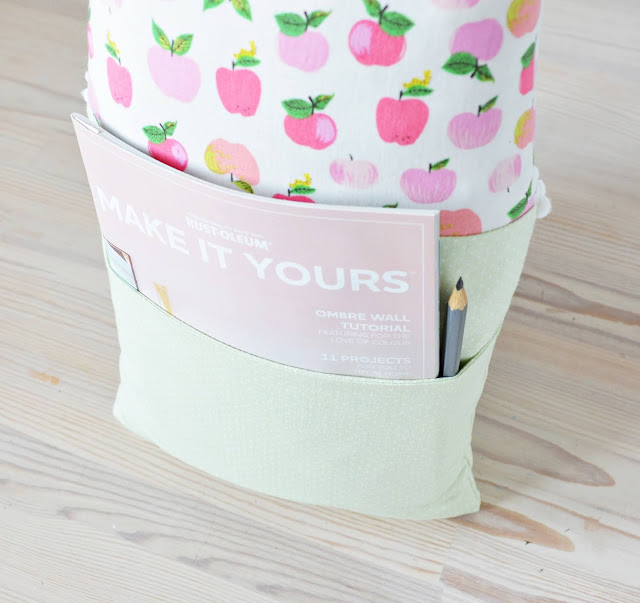
HOUSE CUSHION
Finished size: 37X20cm (14×7")
MATERIALS
- Patterned cotton fabric (for bottom, roof and pocket)
- Сotton fabric scraps (for door, windows and trees)
- Interfacing
- Wooden mini button (for doorknob)
- Lace or pom pom trim
- Ribbon
- Cotton stuffing or other
- Heat-n-bond lite or non woven interfacing
- Chopstick
- Pins or binding clips
- Sewing machine
- Machine needle size 80 or 90
- Applique foot (optional)
- Sewing needle
- Thread
- Marking pen
- Scissors
- Iron
STEP 1
Use the pattern to cut out the pieces for the house (also cut the heat-n-bond out for your door, windows and trees). You can download the pattern here.
STEP 2
Pin and sew the roof and bottom together (seam allowance 1⁄4" or 0,75cm).
STEP 3
Press seams to the dark side.
STEP 4
Cut two pieces of interfacing, using the house as a template and place the interfacing right side down (sticky side) on the wrong side of the pillow. Press the two layers together. If you use interfacing without sticky side, just sew it to the wrong side of the fabric (seam allowance 0,5cm).
STEP 5
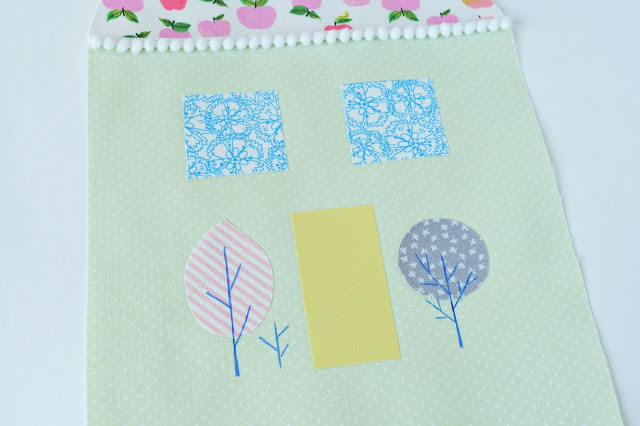
Stick the lace or pom pom trim to the roof, using glue stick. Wait a few minutes and stitch it. Fold a piece of ribbon in half, place it about 2-3" (4-5cm) from the right edge of your roof and stitch it too.
STEP 6
Iron the heat-n-bond pieces to the wrong side of your door, windows and trees. Remove paper backing and lay the pieces onto your house. Press them to attach. Then draw the tree branches, using your marking pen.


So beautiful. Thans for shering.
ОтветитьУдалитьCoisas de Feltro
Thank you so much.
Удалить